
PAINTED BOTANICAL PUMPKINS TUTORIAL

photo & styling Clea Broad
These DIY painted pumpkins are perfect for styling a sophisticated mantlepiece, shelf or table for Halloween or Thanksgiving.
You can use tester pots of wall paint, but to get a similar matt finish like my painted pumpkins, I recommend using Annie Sloan chalk paints.
They come in the most beautiful range of colours and dry really quickly (top tip, you can speed up the drying process up by using a hairdryer on a low heat).
NB. To recreate my pumpkins use Annie Sloan Old Violet for the leaves, over a base of Scandinavian Pink.
Step-by-step guide
STEP 1
Paint the base
Paint the base of the pumpkin in a colour of your choosing and leave to dry.
STEP 2
leaf template
Take a small leaf, press it to the pumpkin with one finger and paint rough strokes outwards in a different colour.
STEP 3
repeat
Remove and discard the leaf and repeat randomly until the pumpkin is covered.
STEP 4
finishing touches
Once dry, roughly paint the centre of each leaf and the pumpkin stem.
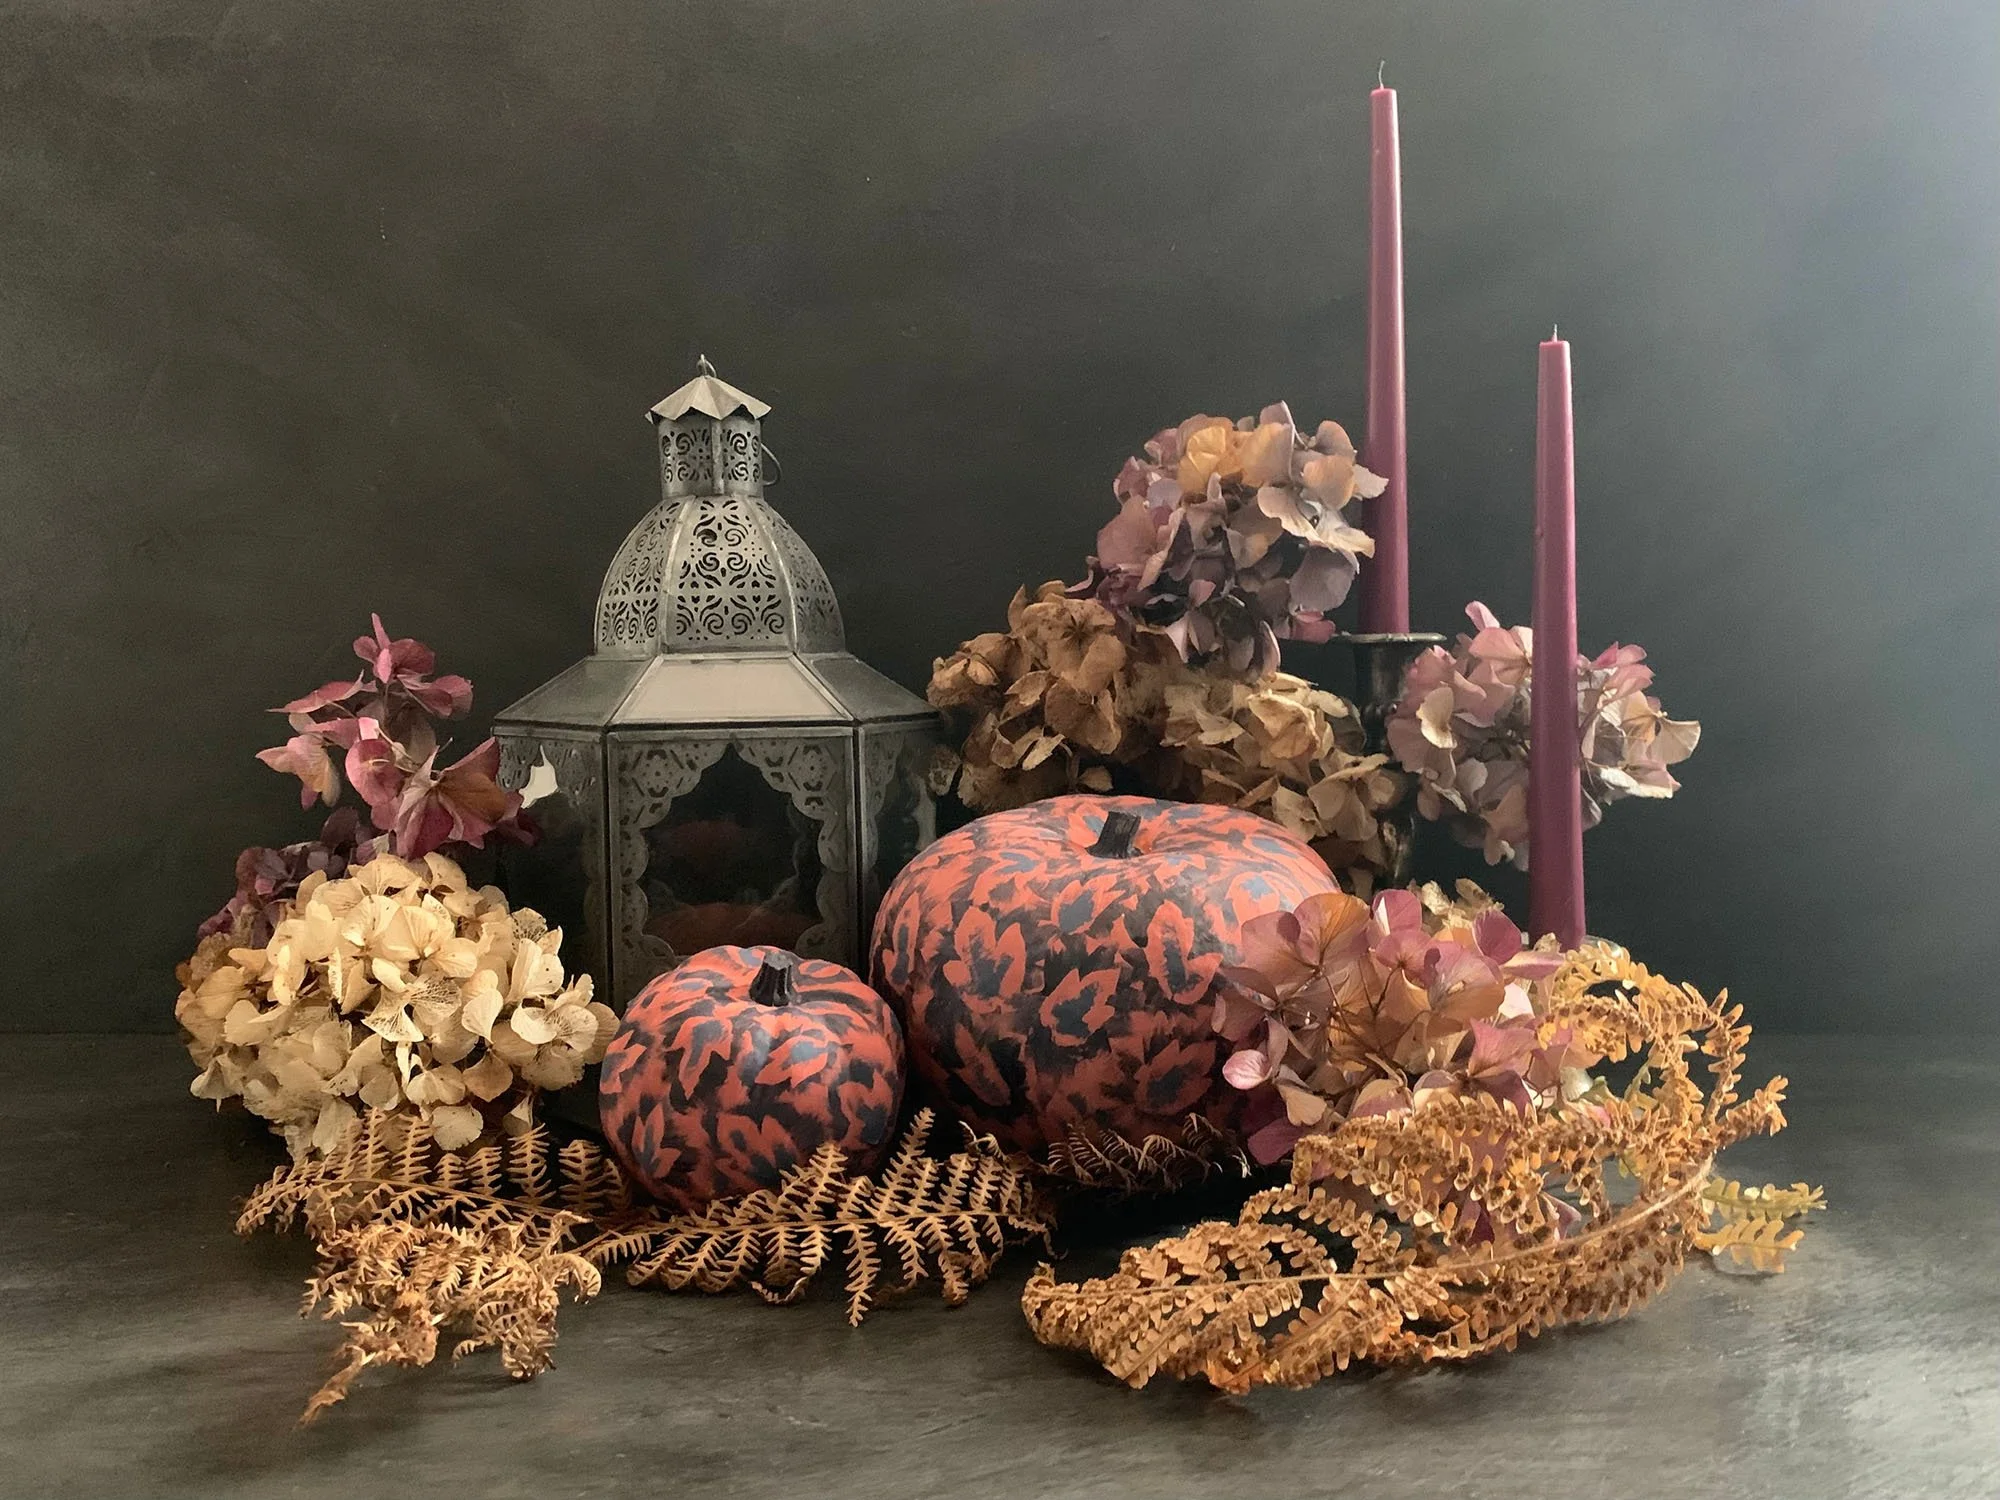
photo & styling Clea Broad
Top Styling Tip
Display your painted pumpkins as I have with lanterns, dark candles and dried seasonal flowers and foliage such as hydrangea and ferns