
HOW TO DYE BOTANICAL BLUE EGGS FOR EASTER

Eggs coloured using natural dyes, and patterned with leaves make a lovely edition to an Easter table, shelf or mantelpiece.This craft project is beginner friendly, and is great to do with children.
You will use leaves from the garden for the botanical pattern, and DIY blue dye created using red cabbage.
The overall effect is a tribute to beautiful Wedgwood china.
what you need
one small red cabbage.
some hardboiled white hens eggs (shells left on).
a few tablespoons of white vinegar.

thin tights/stockings cut into 10cm lengths
scissors
natural string (not coloured)
a medium and a small saucepan
a chopping board
a sharp knife
a spoon

a selection of interesting shaped leaves

INSTRUCTIONS
STEP 1
MAKE YOUR DYE
Roughly chop up the red cabbage, place in a medium saucepan, cover with water and add 4 tablespoons of vinegar.
Simmer on a stove for around an hour to release the dye.
Step 2
PREP YOUR EGGS
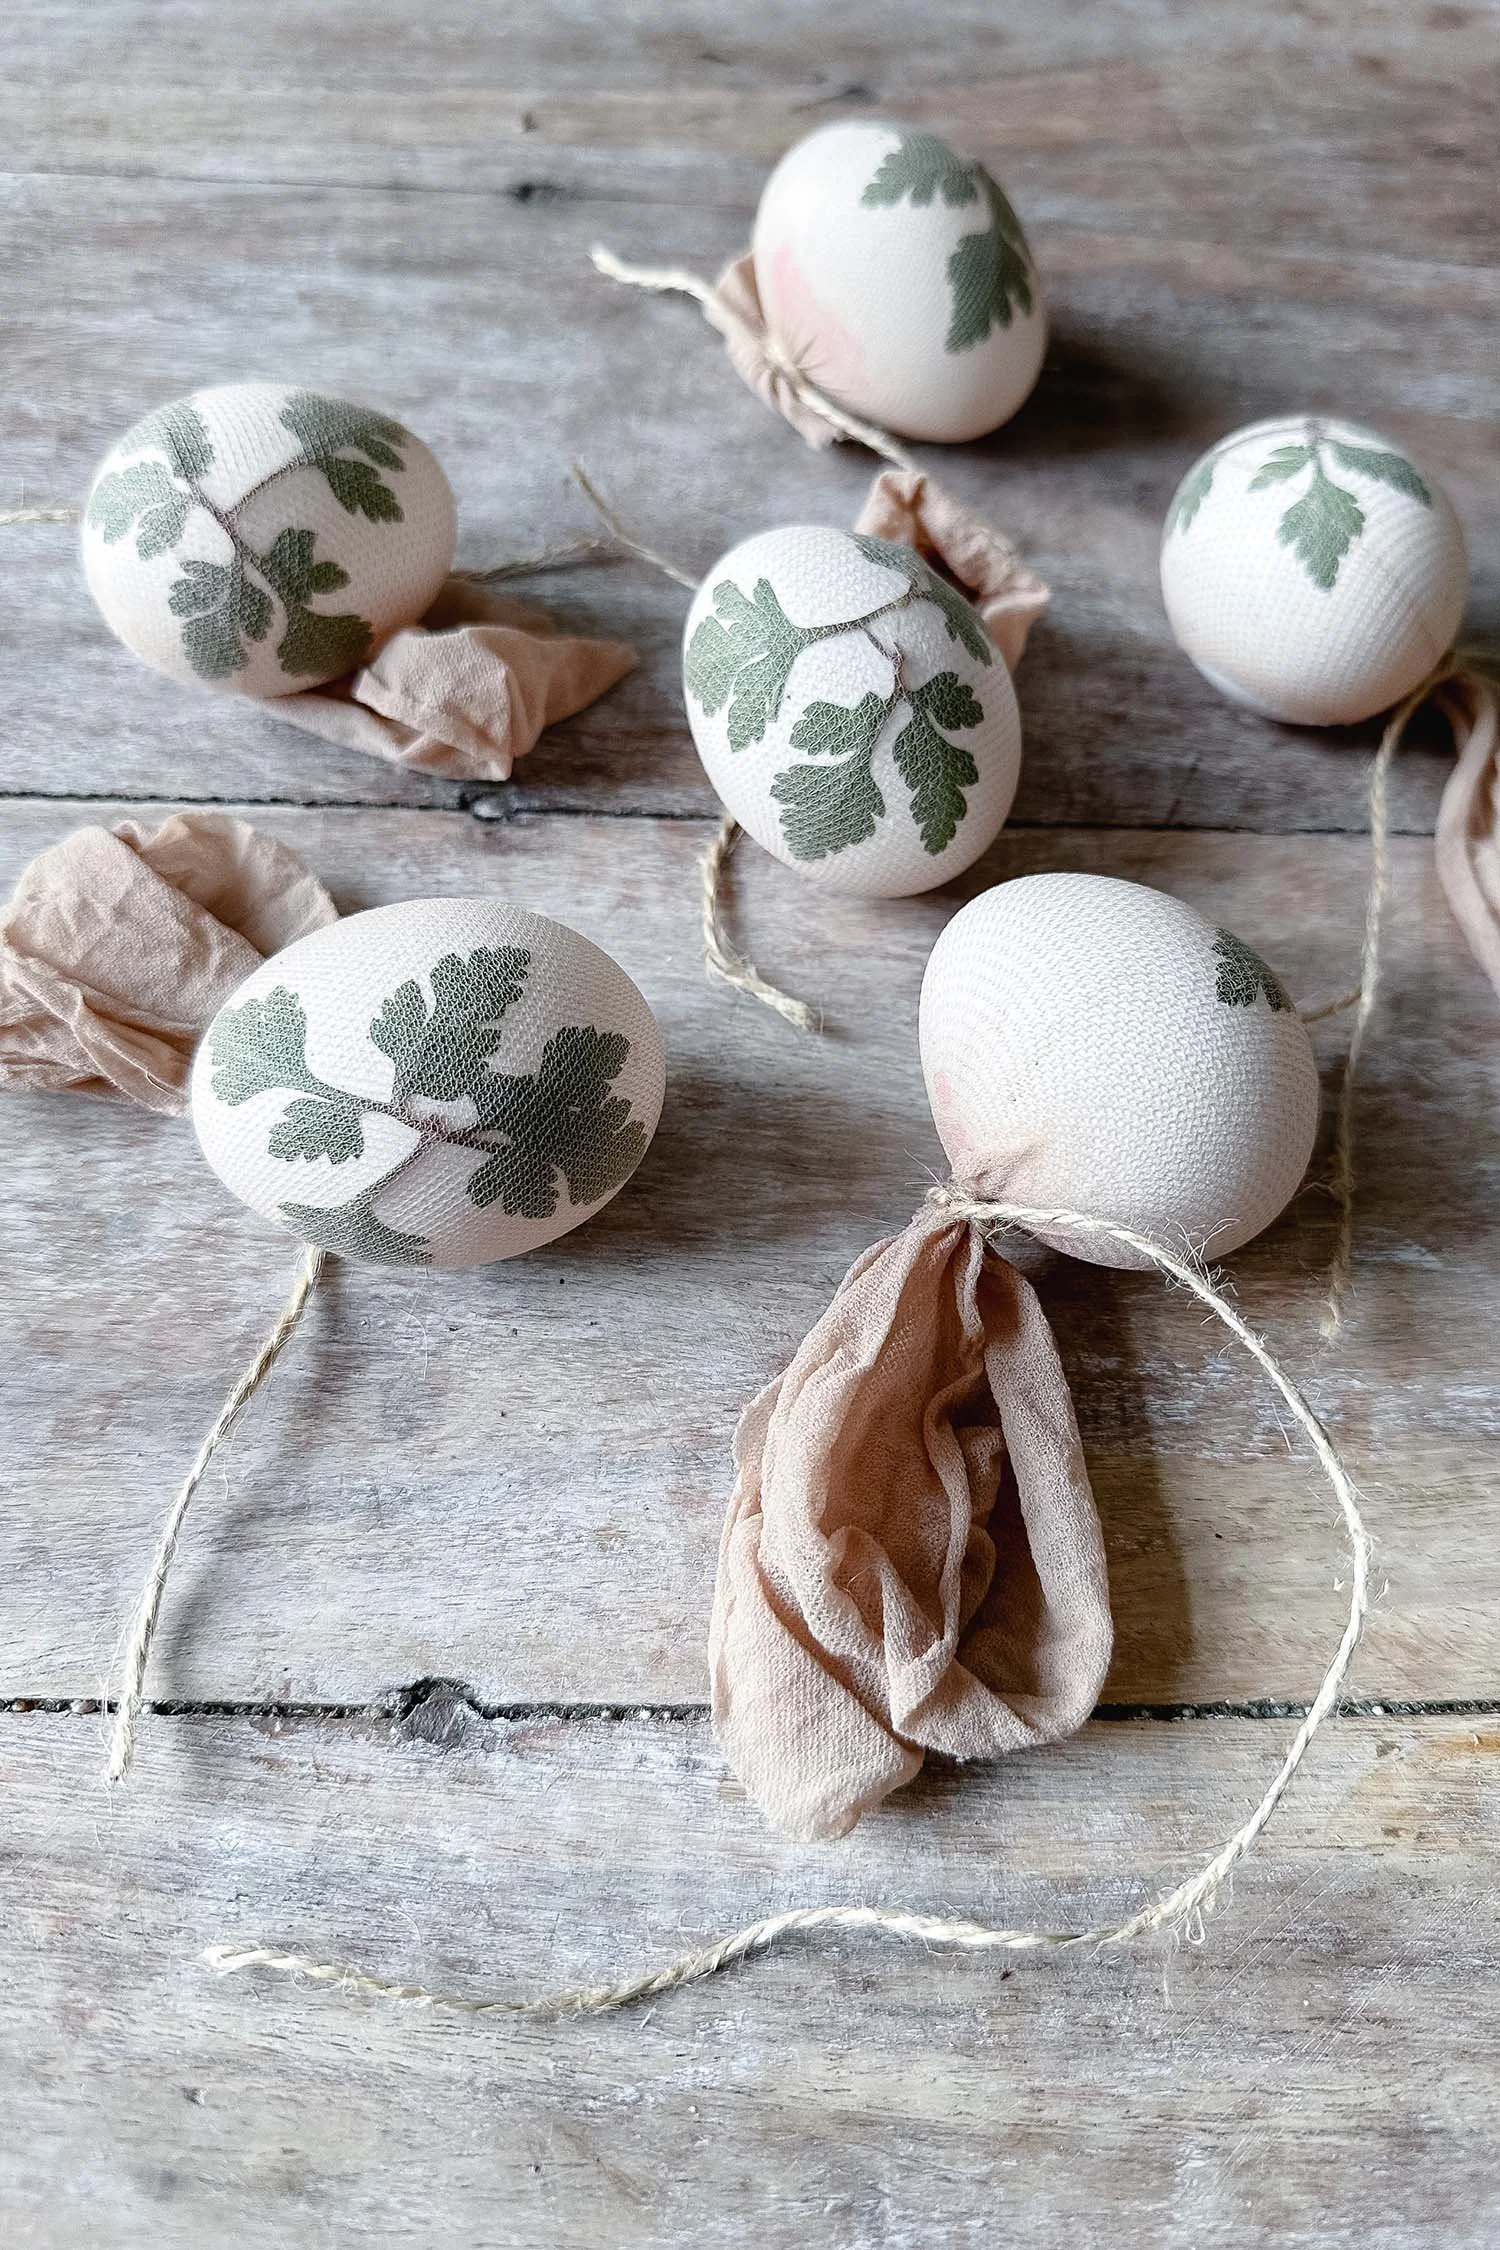
Meanwhile prepare you eggs. Wipe an egg with a damp cloth and place a leaf on the surface in a nice position you’re happy with.
The moisture from the cloth will help the leaf to stay in place for the next step.

Step 3
WRAP YOUR EGGS
Carefully wrap a pice of stocking around the egg, pinning the leaf tight to the surface.
Gather the excess stocking at the back of the egg and tie off using some string. Make sure it is securely knotted.
Repeat with all the eggs.
Step 4
PREP YOUR SAUCEPAN
Place your eggs in a snug saucepan and put aside.

Step 5
STRAIN YOUR DYE
After an hour of simmering, strain your dye into a bowl and leave it to cool completely.
The cabbage can be composted or put in your food bin.
Step 7
DYE YOUR EGGS
Pour enough cooled dye over your eggs to cover and put aside for at least an hour for a pale blue, or longer for a darker blue My eggs were in for an hour and a half in total.

Step 8
RELEASE YOUR EGGS
Carefully remove your eggs, and cut the string to release the stocking. Carefully peel the leaf away.

Step 9
ALLOW YOUR EGGS TO DRY
Stand the eggs on a plate, with your leaf pattern facing up, until completely dry.
